How To Replace Rv Flooring

One of the features I hated most about our rv camper was the idea of carpet. Considering we travel in a rv with our cats, having carpet just felt unsanitary and hard to keep up on cleaning.

Especially when anything carpet was our cats’ favorite place to cough up hairballs…

For a while, we had tried for MONTHS to find the exact same flooring as our rv camper. We have talked to Camping World, tried to contact the manufacture, and even talked to other rv places to help us find resources.

And in the end, we found out our type of flooring was obsolete and erased out of the system because the people who worked with the rv flooring, apparently, say that they “erase that information” every year and focus on the newest campers.

Even though our camper was made in 2022…

Not even that old…

So, that was a bust.

Surprisingly, my husband wanted to take on the challenge of completely ripping up our cheap, vinyl flooring and installing newer, better flooring.

Although I felt exhausted about the idea and it really was a pain in the *ss to renovate while you are rv living in your camper home, it actually turned quite well in the end.

Most importantly, we got to get rid of our disgusting carpet.

So, I wanted to take you along and talk about the step-by-step DIY guide on how to go about replacing your rv flooring (if you are up for the challenge).

Therefore, here are the steps on how to replace rv flooring.

Use a utility knife to cut out your flooring

Yup, it’s that easy!

Well, besides using your strength to rip the flooring out.

Otherwise, you can just cut out the vinyl flooring and carpet in your rv home and rip it up!

However, make sure you get a good pair of pliers because ripping out the carpet will leave behind some sharp staples.

You’ll want to make sure those are all completely ripped out before setting down your new rv flooring!

Choose your type of flooring

Everyone is going to have different preferences on their flooring choice, so here are a couple I have personally heard of when it comes to flooring:

-Sheet vinyl

Sheet vinyl is most likely similar to what campers are using nowadays, especially older motorhomes. You can get sheet vinyl in just about any home goods store, such as Home Depot and Lowes.

It’s pretty affordable and light, so it’s good for camper homes!

-Vinyl tiles

The flooring we got is basically luxury vinyl tiles where you buy them in bulk. Although you can get them at any home good store as well, you can even try your local home good stores as well!

We ended up getting ours at a local flooring store and this type of flooring is a little bit thicker than the vinyl flooring, but thin enough to where it’s also cuttable as well!

-Click-lock planks

I have heard some RVers use these and I’m a little on the fence about it.

Although they are SUPER easy to use and don’t require you to glue down and flatten out like you would with vinyl flooring, the only thing that comes to mind is the added weight click and lock planks would put on a camper home.

If you’re new to the rv life, rv campers have a certain amount of weight it can handle, otherwise, you’ll be putting a lot of wear and tear down on your rv, especially if you travel with it like us.

Now, if you are completely stationary and never plan on moving your camper home, I can see people using these types of flooring.

I’m also a little confused on how cutting these down work. I would make sure you do your own research before investing into these types of flooring, especially when they are a lot more costly than the other options I’ve given you.

Glue down your (vinyl) rv flooring

With our type of flooring, the guy at the store said we could easily do carpet tape. However, when you’re rv living full-time like us, you need to make sure the flooring can withstand the travel, the temperatures, and the wear and tear that you will naturally put on it over the years.

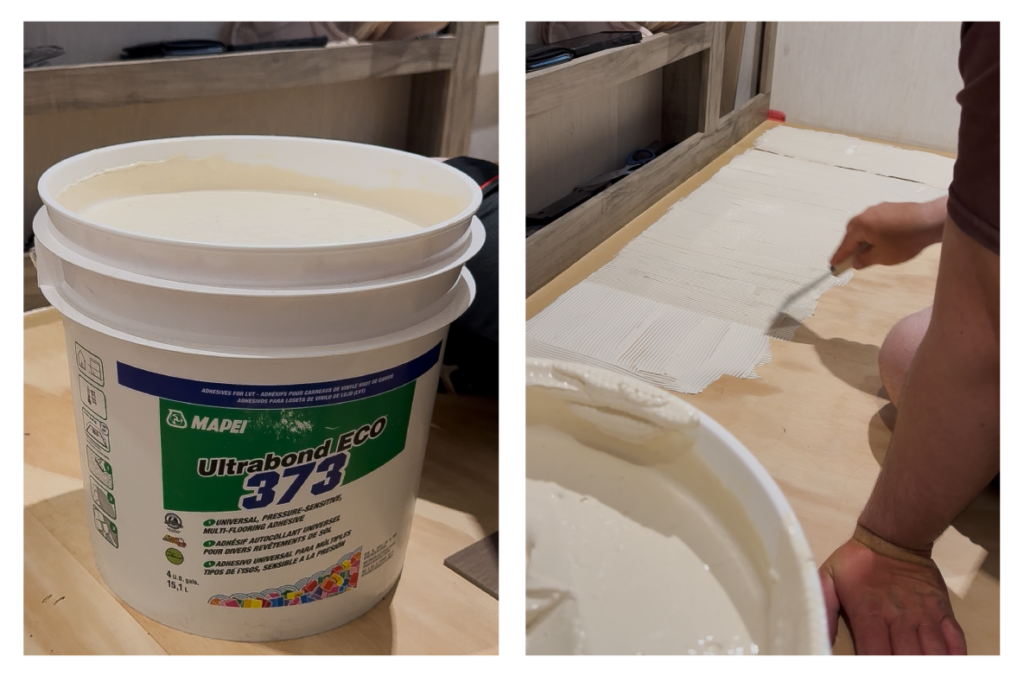
So, I did the research on what kind of glue would be best for flooring you put in a rv and found that one of the best kinds was the Ultrabond ECO 373 by MAPEI.

And yes, this information matters because only certain types of glue will be able to withstand extremely low temperatures.

Otherwise, you’ll find all your hard work falling apart!

This theory was tested when we were gone for a week for the holidays and left our camper behind to visit family in another state.

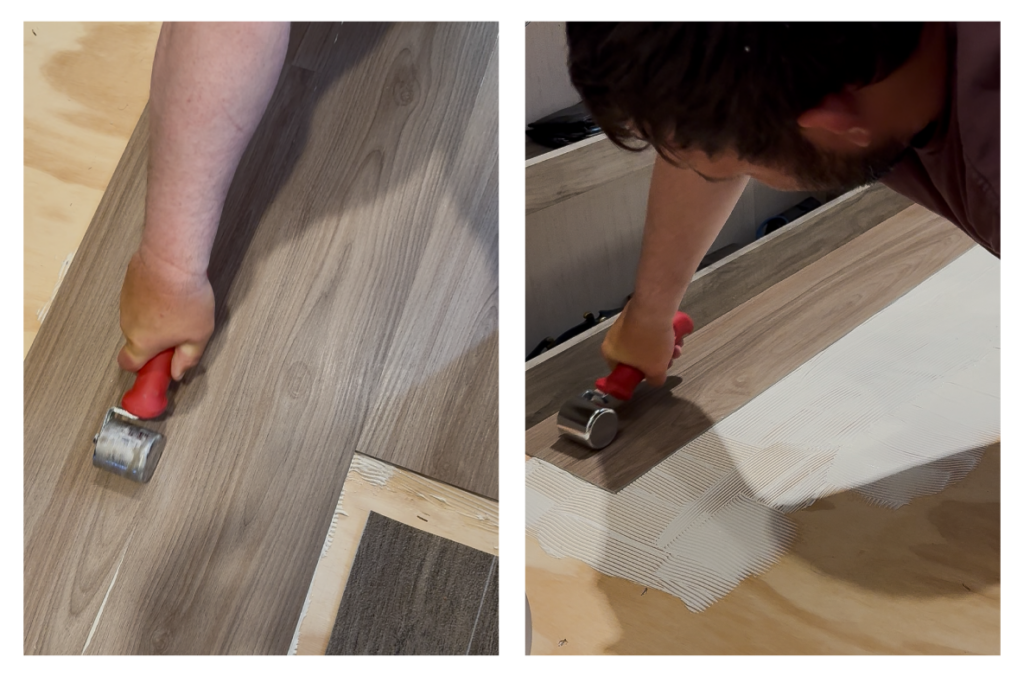
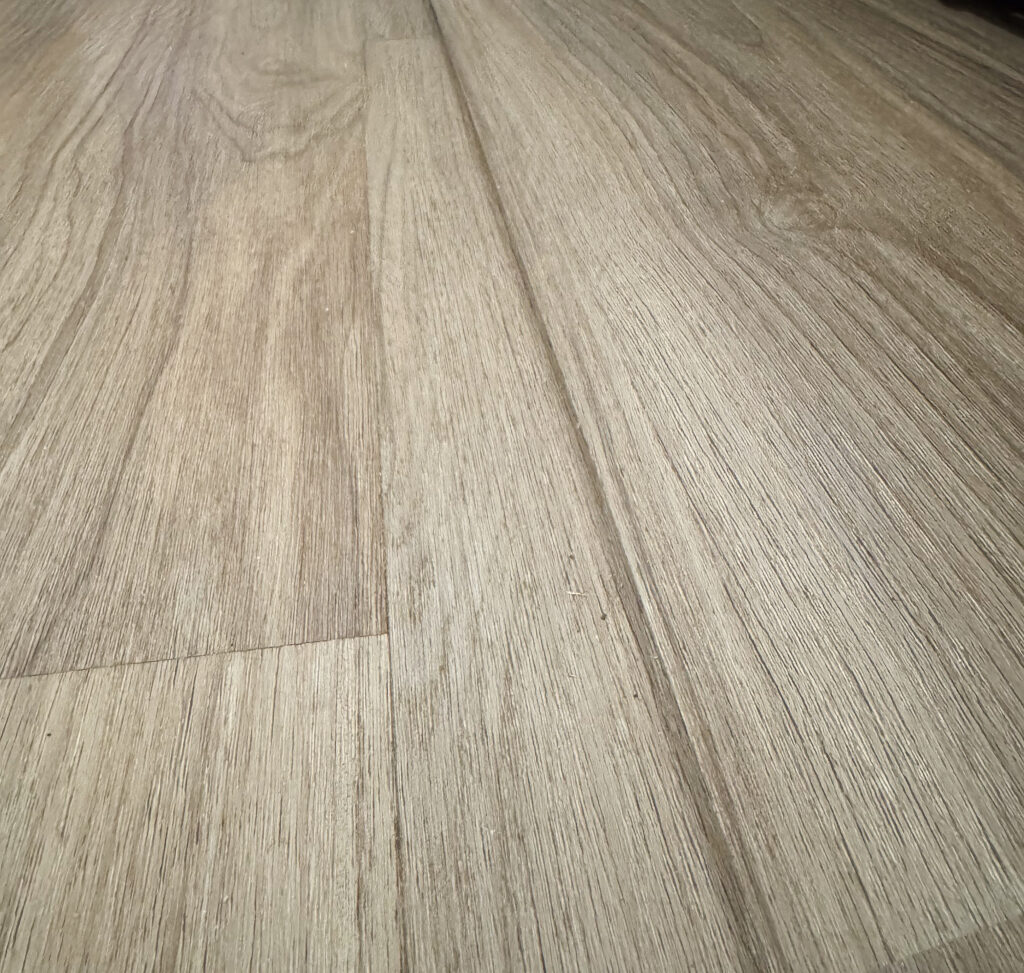
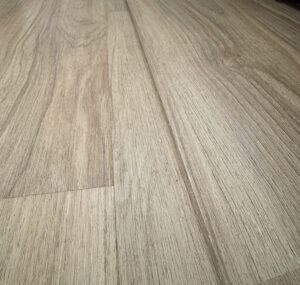
When we came back, the flooring was, still intact.

The only thing we notice that was weird was that, considering our camper was extremely cold throughout that entire time, we notice a few areas of the flooring almost look like they were separate.

For a minute, my husband thought his work did go to waste, but when we warmed the camper back up, the flooring contracted back and we didn’t see the tiny cracks between the vinyl flooring anymore.

So, ChatGBT was right about this glue being able to withstand extremely cold temperatures because your flooring will expand with the freezing temperatures.

If you don’t have the right glue, it WILL break apart!

Not this glue though!

We got to see it for ourselves that this glue was pretty solid!

Roll and flatten out your vinyl rv flooring

You’ll want to get a roller for your vinyl flooring so that you can make sure to flatten out the flooring properly.

Any roller will do and you can easily get these at your retail and home goods store!

So basically, you’ll apply the glue down for your flooring, set the flooring, then roll it out!

For working out the slides…

Depending on your camper slides, you may find your slides having a dip to the edges. This is usually because your carpet folded down to create insulation and keep the temperature in the camper insulated.

When it comes to using vinyl flooring, my husband would have to add weight to the edges and nail them with a nail gun to make sure our vinyl flooring folded down in the direction of the slide.

So far, it has worked out quite well for us and hasn’t caused us any issues when closing our slides.

When working on your slides, I feel like it’s best to start from the edge of the slide to the back of the slide because you can easily cut the vinyl flooring from the back of the slide than you would on the edge of the slide!

I’m a digital nomad who lives the RV lifestyle full-time with my husband! I give advice on the nomadic lifestyle and take you along on my adventures!

Search

Leave a Reply

Your email address will not be published. Required fields are marked *