This post may contain affiliate links, which means I’ll receive a commission if you purchase through my links, at no extra cost to you. Please read full disclosure for more information.

How To Paint Rv Walls And Actually Make It Last!

Look, I know how dingy rv walls can get, especially when you’ve been rv living in the camper for a LONG time.

For our rv renovations, we wanted our rv camper to feel more like a home and not just any other ordinary motorhome.

Painting your rv walls is a great and budget-friendly way to transform your rv home and give it a whole new rv makeover that fits your vision!

Keep in mind, that prepping and painting walls in a camper takes some extra steps versus a brick-and-mortar home.

So, let’s learn how to prep and paint rv walls!

Begin to lightly sand your wall

Although everyone on the rv lifestyle has a different opinion about this, I’ve heard it’s recommended to lightly sand your wall with a 100-220 grit sander (I personally used 220 grit).

Doing so helps create more grip for the paint to stay in place. Some people have skipped this step, especially if you have a really good bonding primer to work with, but I personally like to be safe than sorry!

This is also the time to plug up any holes you may have created in your camper! I personally use the All-Purpose Spackling Paste from DAP and it has worked wonders on covering the random staple holes I would find around our camper.

Also, if you have any tears or places that are bubbling underneath the wallpaper, it’s HIGHLY recommended to just cut out the part that is bubbling and sand over it, so that the wallpaper edges blend more seamlessly for painting.

IMPORTANT NOTE: you will NOT be tearing off any of the vinyl wallpaper in your camper. This wallpaper isn’t just any other wallpaper and NEEDS to stay on your camper.

This is because the vinyl wallpaper acts as a barrier against harsh weather conditions, as well as condensation that often happens when you are full-time living in a camper.

Instead, you will be painting over this wallpaper and YES, you can paint over the vinyl wallpaper in the camper!

As long as you prep the wall beforehand, then the paint on your wall will last BEAUTIFULLY.

Wipe down the walls with TSP (or TSP substitute)

This step is CRUCIAL because like I’ve mentioned before, rv walls get really dingy when you’re living in them!

So, you’ll be washing down the walls with TSP or TSP substitute.

TSP is a heavy-duty cleaner that helps get tough grease and grim off, so it’ll get the job done right!

Depending on what kind of TSP you are using, you’ll want to wear protective gloves, goggles, a large bucket, and maybe open up some windows to keep strong fumes out of your camper.

Now, I personally used TSP substitute and it worked just as well and it didn’t have a strong scent to it, especially when you just mix it in some water.

You can do the same if you or anyone in your camper is sensitive to smells!

All you have to do is read the instructions on the bottle, which will vary from the different types of TSP brands out there!

Afterwards, I like to be safe and do another wipe with a damp cloth just so I know that TSP solution isn’t left over on the wall. Make sure to let it dry before moving onto priming the walls!

Prime your wall!

PHEW!

Now that we got the maintenance down, it’s time to FINALLY prime your wall!

Now, before you just buy any primer sitting out on the shelf, it’s important to note that you want a WATER-BASED BONDING primer.

Key word: BONDING.

A bonding primer works the best with rv walls and it’s CRUCIAL to not skip this step!

After research and personal experience, here’s what I learned:

-Kilz bonding primer is great and good for high moisture areas

-Zinsser bonding primer is a good, budget-friendly primer

-Sherman Williams is an extreme bond primer that is even used in homes and top-tier (however, is the most expensive)

Now, I personally used the Behr Mult-Surface Stain-Blocking Primer & Sealer. It was recommended to me by the people at the store and I was told it was climbing in the ranks of best primers out there.

I went with it because I honestly didn’t want to put too much money into the camper since we eventually want to get a bigger camper in the future anyways.

It did do the job well and it really wasn’t crazy expensive. So, if you want a primer that does the job well and you want a BUDGET-FRIENDLY primer, try out Behr!

I personally did two coats of primer just to be safe.

Plus, it only took about an hour for the primer to dry before I could put on another coat of primer, so the drying process wasn’t long at all!

IMPORTANT NOTE: Get yourself a good cut-in brush to paint the edges of your wall. I LOVED the Wooster shortcut brush because it didn’t shed at all during the priming process!

You will also want a good ole paint roller, which I personally used the 3/8” microfiber nap by Wooster Pro.

This paint roller was the same type of paint roller I used on the color paint as well!

Again, they are shed resistant, held paint WAY better than other rollers I used, AND, they come with replacement rollers whenever you want to replace it or swap paint colors!

Paint your wall with your desired color

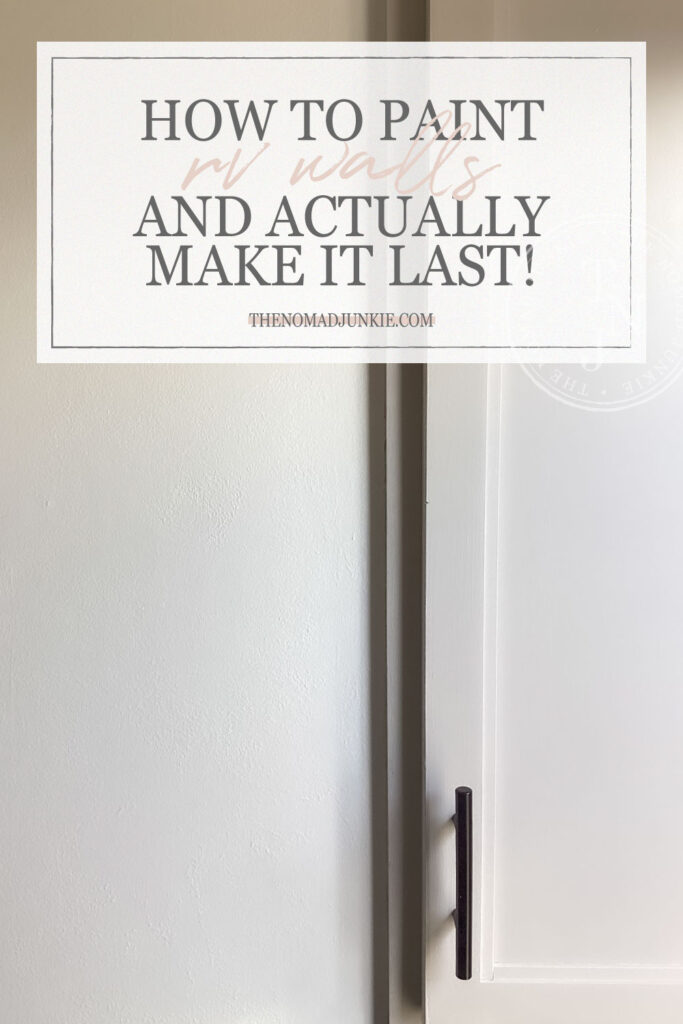
Ok NOW we are at the last step and favorite step of the process: painting your wall with your chosen color!

According to research and through my personal experience, here’s what I’ve learned:

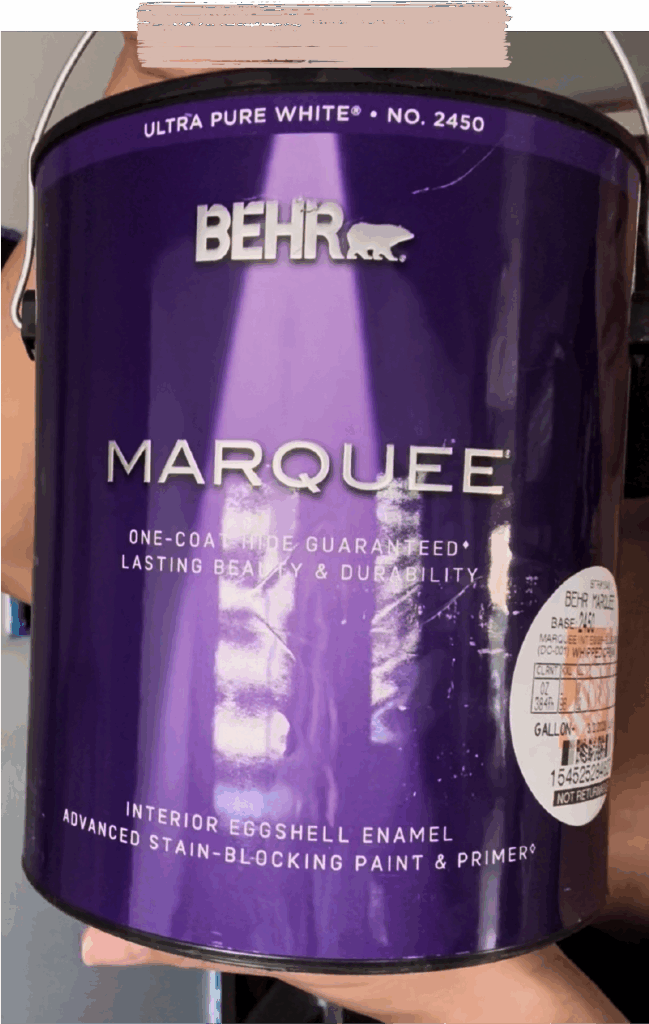
-Eggshell finish is the most recommended type of paint to use on rv walls, especially since rv walls can come with a lot of imperfections. If you are like me who had bubbles in your walls or places that were peeling off, eggshell will hide those imperfections THE BEST.

-Semi-gloss and satin will show too many imperfections because of the shine that comes with it

-Flat paint DOES NOT do well with high humidity

So yeah, it’s mainly recommended to use eggshell finish when it comes to the type of paint you are using, no matter what brand you are using for your rv walls.

Also, absolutely NO oil-based paint.

I mean this is pretty obvious since we’re using a water-based bonding primer.

Plus, oil-based paint WILL melt off your rv walls over time.

And honestly, who wants to deal with that?

Since I used Behr for the bonding primer, I also used it for the paint.

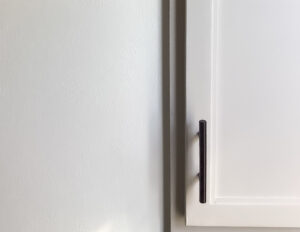
If you are truly curious what color I chose, I chose the color “Whipped Cream” which was this soft white color that worked well with the soft theme of the camper.

Again, this color was in the eggshell texture and as you can see in photos, now the camper really does have this homely vibe to it!

I’m a digital nomad who lives the RV lifestyle full-time with my husband! I give advice on the nomadic lifestyle and take you along on my adventures!

Search

Leave a Reply

Your email address will not be published. Required fields are marked *